


Game Information
Blundstone Arena
| fourth Quarter | |||
|---|---|---|---|
| Time | Team | Play | Score |
| 23:38 |  | P. Curtis Behind | 71 - 103 |
| 22:29 |  | K. Chandler Goal | 70 - 103 |
| 20:19 | | Rushed | 70 - 97 |
| 14:12 | | A. Neal-Bullen Behind | 70 - 96 |
| 12:23 | | C. Petracca Behind | 70 - 95 |
| 9:11 | | C. Taylor Goal | 70 - 94 |
| 7:13 | | C. Petracca Behind | 64 - 94 |
| 5:36 | | Rushed | 64 - 93 |
| 4:15 | | J. van Rooyen Behind | 64 - 92 |
| 0:16 | | J. Stephenson Behind | 64 - 91 |
| third Quarter | |||
| Time | Team | Play | Score |
| 30:06 | | J. Melksham Behind | 63 - 91 |
| 28:14 | | A. Neal-Bullen Goal | 63 - 90 |
| 26:04 | | J. van Rooyen Goal | 63 - 84 |
| 24:32 | | J. Simpkin Goal | 63 - 78 |
| 20:25 | | A. Neal-Bullen Goal | 57 - 78 |
| 19:08 | | C. Petracca Goal | 57 - 72 |
| 16:30 | | W. Phillips Behind | 57 - 66 |
| 12:47 | | C. Petracca Goal | 56 - 66 |
| 10:17 | | H. Petty Goal | 56 - 60 |
| 6:01 | | Rushed | 56 - 54 |
| 3:28 | | Rushed | 56 - 53 |
| second Quarter | |||
| Time | Team | Play | Score |
| 33:00 | | J. van Rooyen Goal | 56 - 52 |
| 30:41 | | K. Pickett Goal | 56 - 46 |
| 29:40 | | Rushed | 56 - 40 |
| 26:43 | | K. Chandler Goal | 56 - 39 |
| 25:01 | | T. Goldstein Goal | 56 - 33 |
| 21:49 | | N. Larkey Behind | 50 - 33 |
| 20:02 | | K. Chandler Goal | 49 - 33 |
| 17:32 | | A. Neal-Bullen Goal | 49 - 27 |
| 15:54 | | P. Curtis Goal | 49 - 21 |
| 14:38 | | J. Stephenson Behind | 43 - 21 |
| 14:38 | | J. Stephenson Behind | 43 - 21 |
| 12:13 | | H. Petty Goal | 42 - 21 |
| 8:21 | | K. Pickett Goal | 42 - 15 |
| 5:35 | | R. Hansen Jr Behind | 42 - 9 |
| 1:06 | | N. Larkey Goal | 41 - 9 |
| first Quarter | |||
| Time | Team | Play | Score |
| 34:15 | | C. Petracca Behind | 35 - 9 |
| 31:15 | | E. Ford Goal | 35 - 8 |
| 30:44 | | N. Larkey Behind | 29 - 8 |
| 26:03 | | J. van Rooyen Behind | 28 - 8 |
| 21:50 | | B. Scott Goal | 28 - 7 |
| 17:30 | | E. Ford Goal | 22 - 7 |
| 15:26 | | E. Ford Goal | 16 - 7 |
| 12:51 | | T. Goldstein Goal | 10 - 7 |
| 12:26 | | Rushed | 4 - 7 |
| 8:17 | | T. Sparrow Behind | 3 - 7 |
| 7:11 | | K. Pickett Goal | 3 - 6 |
| 6:10 | | L. Davies-Uniacke Behind | 3 - 0 |
| 5:02 | | B. Scott Behind | 2 - 0 |
| 0:37 | | P. Curtis Behind | 1 - 0 |
Who nailed their season and who's got a long summer ahead? Isadora McLeay hands out a pass or fail verdict for every AFLW team whose season is done and dusted for 2025.
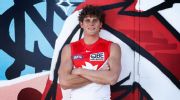
Charlie Curnow is the missing piece that can help take Sydney back to the AFL heights, says captain Callum Mills.
Richmond have extended Adem Yze's contract until the end of the 2028 AFL season in a show of faith in their direction under their head coach.
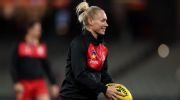
AFLW legend Erin Phillips has been charged with turning Gold Coast's ailing AFLW program after being appointed as the Suns' general manager of women's football.
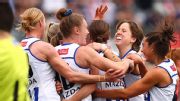
Jas Garner all but seals North Melbourne's place in the Grand Final with an opportunistic final-quarter goal against the Dees.
The 2025 AFL Draft has been run, but which team won? ESPN's draft expert Jasper Chellappah has cast his eye over every club and handed down a grade. Who takes out the lone A+?
| POS | Team | Pts. | % | Form |
|---|---|---|---|---|
| 1 |
 ADEL ADEL
|
72 | 139.3 | WWWWW |
| 2 |
 GEEL GEEL
|
68 | 141.5 | WWWWW |
| 3 |
 BL BL
|
66 | 114.2 | LWLWW |
| 4 |
 COLL COLL
|
64 | 122.4 | WLLLW |
| 5 |
 GWS GWS
|
64 | 115.3 | WLWWW |
| 6 |
 FRE FRE
|
64 | 109.0 | WWWLW |
| 7 |
 SUNS SUNS
|
60 | 124.9 | WWLLW |
| 8 |
 HAW HAW
|
60 | 120.9 | WLWWL |
| 9 |
 WB WB
|
56 | 137.0 | WWWWL |
| 10 |
 SYD SYD
|
48 | 97.0 | LWWLW |
| 11 |
 CARL CARL
|
36 | 96.7 | LLLWW |
| 12 |
 STK STK
|
36 | 88.5 | WWWWL |
| 13 |
 PORT PORT
|
36 | 79.8 | LLLLW |
| 14 |
 MELB MELB
|
28 | 93.3 | LWLLL |
| 15 |
 ESS ESS
|
24 | 69.5 | LLLLL |
| 16 |
 NMFC NMFC
|
22 | 76.3 | LLLWL |
| 17 |
 RICH RICH
|
20 | 66.0 | LLLLL |
| 18 |
 WCE WCE
|
4 | 60.1 | LLLLL |